 |
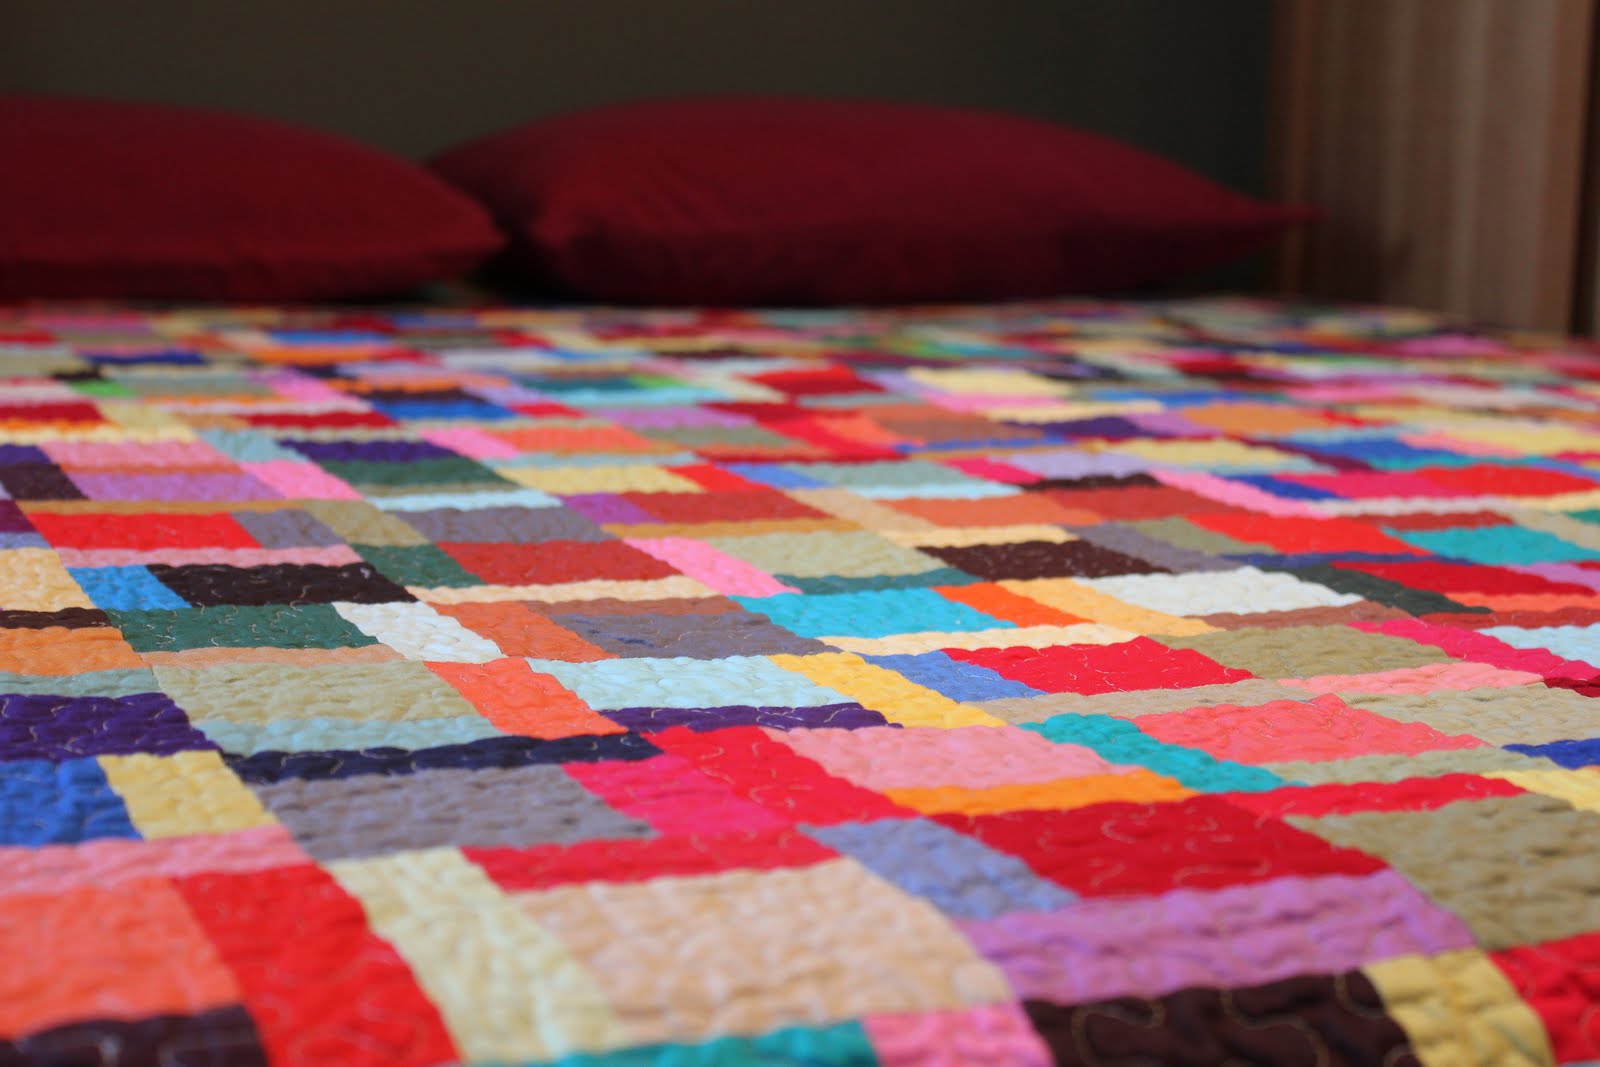
| Finished -- Confetti quilt made from solid scraps into a queen size quilt |
It's funny, when you spend nearly 6 months working on something, you get pretty excited about the final post!
The Confetti quilt was made to go on the murphy bed in the den at the cabin. When we were initially designing the cabin, we faced a balancing act of keeping as much public area for us as we could, while still creating private space for guests when they were here. In the end, we created both a guest room and a den in the plans.
Then the challenge was to come up with sleeping options for the den where the person/couple who ended up in the den didn't feel like they had drawn the short straw for the weekend. After thinking through a variety of options, I came up with a murphy bed that goes into the wall like a closet. This is much easier to pull off when you are designing a house, then to try to modify once you have a finished house.
 |
| View of murphy bed in den from main room |
Our den is just off the great room. We had found some fabulous old carriage doors at a 2nd hand store which we painted and then had the door frame built to handle them as a bi-fold (a second set was put side by side and hung like a barn door to close off the utility room).
 |
| The windows and built in desk in the den |
The den faces the mountains and the canal ...
 |
| The 'view' |
And of course ... now whoever gets this room gets to sleep under this sweet quilt!
 |
| Back of the Confetti quilt |
 |
| Scraps of colors |
 |
| Binding and meandering quilting |
The quilt by the numbers:
- 440 blocks on the front, 132 blocks on the back -- 20 x 22 blocks
- Each block is comprised of 3 pieces -- 3.5" x 3.5" square accompanied by a 3.5" x 1.75" strip and a 4.75 x 1.75" strip.
- 75% of the pieces came from my scrap bin.
- It is quilted with a light gray thread in a relatively light tight meandering pattern (which I accomplished on my Pfaff portable home sewing machine).
The biggest surprise for me on this quilt was how much it shrank. I expected 7%, it was over 10%. It works fine on the murphy bed, but would not want to use it on a regular bed where's its set up all the time as it wouldn't have enough drop one either side ... it really should have been 22 x 23 blocks -- which would have required an additional 66 blocks. I am not sure if it was the tight quilting that caused the additional shrinkage. The
only other queen size quilt I have made shrank by 7%, so that's where I got my thinking from, but it was quilted in a straight line with far less quilting.
For anyone who's interested, here are the other posts created in the making of this quilt.
Other than the slight challenge with the shrinkage ... I am THRILLED with how it came out. I've pulled the murphy bed down today for the photo shoot ... and now I don't want to put it away ... I like looking at this quilt, it's bright and it makes me smile ... just like a quilt should!
All the best
Lisa


What a gorgeous riot of color! With that fantastic quilt and the view out that window I'd say your guests are in for a wonderful retreat. Love it!!
ReplyDeleteFabulous quilt! Love both sides and your Murphy is a great idea.
ReplyDeleteLove both sides of the quilt. I'd happily stay in the denwith that on the bed and the glorious view out the window!
ReplyDeleteWow...fab quilt and fab view!
ReplyDeleteFabulous quilt and it looks so right on that bed. How satisfying to use up so many scraps!
ReplyDeleteThis quilt is just stunning, Lisa! I love the back as much as the front.
ReplyDeleteI hope you like guests because, with that quilt and that view, they'll never want to leave :)
WOW. Excellent job, I love it!
ReplyDeleteCongratulations.
Just gorgeous! Love the colours. I may have to make my own!
ReplyDeleteEveryone has said it but I have to be redundant "Goregous!" I'm sure your guests will enjoy the quilt and be in awe of how many pieces it takes to make a quilt. Again, lovely! Toni
ReplyDeleteOh, Lisa, it's fabulous! I want to come stay in your den!!!! And oh, such a pretty place to sew....
ReplyDeleteIt looks fabulous Lisa! No one will feel like they've got the short stick sleeping under this quilt. The views from your den look incredible, too. We put a Murphy bed in my sewing room (okay, it used to be a bedroom) so that we would still have that guest space - they are a great thing to have.
ReplyDeleteLOVE the quilt and the binding (I'm a total fool for striped binding) but I really love the idea of the carriage doors to hide the Murphy bed - what a genius idea! Thank you for sharing your pattern idea and all the nuts and bolts that went into the quilt, too.
ReplyDeleteLIsa, One of the best surprises with the Murphy bed will be your color explosion when the guests open it. So fun and love the back too. Your tutorial was just perfect, jill
ReplyDeleteI love the back of the quilt as well. It's to beautiful to hide inside the Murphy bed when it's up. Please Please tell me you don't hide that inside the Murphy bed. It turned out so well!!
ReplyDeleteLOVE your confetti quilt!!
ReplyDeleteThis is amazing! The colours are gorgeous!
ReplyDeleteThat is utterly stunning - and exactly what I would attempt if I had once ounce of your talent. Love it!
ReplyDeleteI don't know how I missed this post in my blog reader. It's fabulous and I almost like the back more than the front. With that quilt and that view, I would happily choose that room rather than the guest room!
ReplyDeleteI have your blog in my favorites and often check it for inspiration. Having said that, I nominated your blog for the Liebsters blog award! I hope you accept it.
ReplyDeletehttp://jeanette-stampingobsession.blogspot.com/2012/03/liebster-blog-award.html